[Tutor] Asus Zenfone 4 CHT Lollipop

Download FW CHT v4.3.2 : http://dlcdnet.asus.com/pub/ASUS/ZenFone/A400CG/ASUS_T00I_CHT_4_3_2_UpdateLauncher.rar?_ga=1.46881508.255534922.1432705791

Download FW CHT v6.6.3 : http://dlcdnet.asus.com/pub/ASUS/ZenFone/A400CG/UL-ASUS_T00I-CHT-6.6.3.0-user.zip?_ga=1.156939896.255534922.1432705791

Download FW Lollipop CHT : http://dlcdnet.asus.com/pub/ASUS/ZenFone/A400CG/UL-ASUS_T00I-CHT-7.3.3.0-user.zip?_ga=1.77107926.255534922.1432705791

ADB fastboot tool : https://www.tusfiles.net/ydq3nnumv24w

1. Copy FW CHT v4.3.2 ke SD card
2. Extract boot.img dan fastboot.img dari  FW CHT v6.6.3
3. Buka ADB Fastboot kemudian Flash file boot dan fastboot.img
– fastboot flash boot boot.img
– fastboot flash fastboot fastboot.img
4. Pilih Reboot Droidboot
5. Pilih SD Download
6. Masuk Droidboot lagi
7. Factory Reset
8. Copy File Update CHT 6.6.3
9. Update ke 6.6.3
10. Copy File Update 7.3.3
11. Update ke 7.7.3
12. Selesai

Root Asus Zenfone 5 KITKAT Versi 2.22.40.53

You need for this rooting method
1. Root z5
2. Intel driver
3. USB Cable
4. Windows pc
I am using windows 7 for this work.

Root Kitkat Zenfone 5 versi  WW 2.22.40.53

Download link : ABOVE THIS POST
1. Xtract File RootZenFone5Versi-WW.2.22.40.53.rar
2. Open folder file RootZenFone5Versi-WW.2.22.40.53 on your pc and click files>hold shift + right>choose open command window.
3. Open file RootZenFone5Versi-WW.2.22.40.53, click Root-ZenFone.bat
4. Enter …wait to finish process

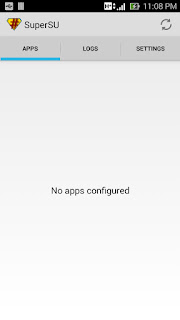
Last reboot will appear, check your phones app drawer, if you can see SuperSU, congrats! you are now rooted.


Download RootZenFone5Versi-WW.2.22.40.53.rar

Bagikan melalui Facebook / Twitter / Google Plus untuk melihat Link Download
Share Via Facebook/Twitter/Google Plus To see Download Link Tweet

Update Asus Zenfone 4 Lollipop Firmware Version CHT_7.3.3 (Android L)

Version  CHT_6.6.3 (Downgrade Version) 

Description ASUS ZenFone 4(A400CG) downgrade SOP (Downgrade from L to KK), V9.9.9.0 Only for CHT SKU*
Notice: 
1. Only apply to same SKU update, Example: WW->WW, CN->CN, TW->TW. 
2. Software update cannot transfer the software SKU and downgrade the software version. 
3. Downgrade image will only revert back to latest KK version 
4. After OTA downgrade, device will perform factory reset automatically.then reboot automatically to complete upgrade process
5. System upgrade may cause part of data missing, please buckup your important data before system upgrade 


Downgrade Step (From L to KK)
1. Download the downgrade tool: UL-ASUS_T00I-WW-9.9.9.0-user.zip
2. Using MTP connecting A400L with PC. (Enable MTP: Setting–>Storage–>press the USB icon on right corner–> Enable MTP)
3. Copy the tool (V9.9.9.0) to the A400CG internal storage.
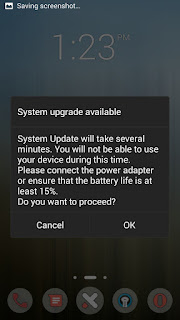
4. Remove the USB cable, the device will pops up the system upgrade information.
5. After downgraded, device will auto reboot and perform factory reset.
6. After finished, please go to Settings->About-> software information->Build number. The version should be V6.6.3
File Size
887,68 (MBytes) 2015.05.26  update
Download from
 Global (DLM)  Global  P2P

Version  CHT_7.3.3 (Android L) 
Description ASUS ZenFone4(T00I) software Image: V7.3.3 (Android L) for CHT only*
Note1: Please make sure update software version V6.6.3 first 
before update to software version V7.3.3
Note2: Download the OTA file and put the file to the device root directory directly.

Please note! The listed apps below will be removed once the 
Android 5.0 Lollipop upgrade is complete.

1. battery Widget
2. Google Text-To-Speech
3. Movie Studio


Please notice that below new apps will be added in this system upgrade. 

1. CleanMaster 
2. ASUS Auto-start Service Manager:
Prevent unwanted apps from automatically starting up and using RAM
Stop services immediately and prevent Android from restarting these apps again
3. ASUS Support
Add Assistance in ASUS Help
Support bug reporting mechanism? 
Enable Push notification service 
Add unread count badge
Add new item reminders for articles
Support Google Analytics mechanism

Please notice that some feature changes in this system upgrade. 
1.Lockscreen: remove standalone wallpaper & weather info
2. Dialer/Contacts: reduce tab count from 5 to 3; remove group tab name/photo
3. InCall screen: remove inCall animation & cover
4. Quick settings/Recent app layout change

Steps of Update: 
1.Check software version of your device**
2.Download device software and Update SOP (From “Manual” Item)
3.Only apply to same SKU update, Example: WW->WW, CN->CN, TW->TW.
4.Software update cannot transfer the software SKU and downgrade the software version.
5.Wrong SKU may cause update failure, please update the same SKU version only.

*How to know the device model? 
Path: Settings->About-> Model number
Example: ASUS_T00I
**How to know the device software version? 
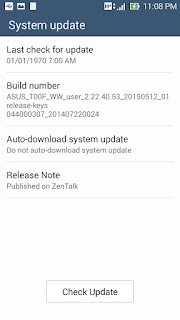
Path: Settings->About-> software information->Build number
***System upgrade may cause part of data missing, please buckup your important data before system upgrading.
File Size
827,13 (MBytes) 2015.05.26  update
Download from
 Global (DLM)  Global  P2P

Update Firmware Asus Zenfone 5 [ZenFone5] [150512]A500CG /A501CG_ WW_V2.22.40.53_20150512

Firmware WW 2.22.40.53/2.22.40.54 , Fixed of incoming call issue HERE !!!


Root Asus Zenfone 5 KITKAT Versi 2.22.40.53


【Version】
V2.22.40.53_20150512

【Model Name】

A500CG / A501CG

【Release Date】
2015/05/26

【Release Note 】

  • Battery Draining Detection
  • Add Battery Draining Detection feature
  • Notify to close or uninstall the battery draining apps when detected.
  • The disable setting is under the Battery setting.


  • Auto start service manager
  • Save battery: prevent unwanted services from self-start and to save system memory.
  • Save memory : Kill services immediately and they won’t be started by Android again.


  • Added ASUS ZenCircle :
  • Explore and follow the most popular or featured creations
  • Interact with friends via likes and comments
  • Share photos to Facebook, LINE, and other social networks
  • Built-in camera lets you take photos then apply customizable filter effects.
  • Discover amazing photo stories created using ASUS PixelMaster Camera and ASUS PhotoCollage


  • Added ASUS PhotoCollage (Stub):

           PhotoCollage features a simple and intuitive interface that uses smart face detection to collage photos using customizable grid templates, 
           to apply magazine-styled themes, and to add instant photo effects to your photo collection. It also includes fun themed stickers, templates for 
           special days, and lots of customization tools that let you add your own personality to your photo collection.

http://fota.asus.com/delta_package/phone/WW_a501cg/formal/WW_user_2.21.40.44_20150117_82-user-WW_a501cg-WW_user_2.22.40.53_20150512_01-user-WW_a501cg-20150513/WW_501_0117_0512_20150513.zip

Instruction

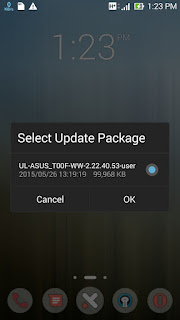
rename the download file to UL-ASUS_T00F-WW-2.22.40.53-user.zip
place on root of internal memory card and reboot
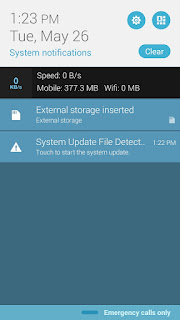
after reboot you will see a notification of update then follow the instruction

Versi TW_2.22.40.53
Deskripsi ASUS ZenFone 5(T00F/T00J) software Image: V2.22.40.53 for TW SKU only*
Improvement Item:

Battery Draining Detection
1. Add Battery Draining Detection feature
2. Notify to close or uninstall the battery draining apps when detected.
3. The disable setting is under the Battery setting.

Auto start service manager
1. Save battery: prevent unwanted services from self-start and to save system memory.
2. Save memory : Kill services immediately and they won’t be started by Android again.

Added ASUS ZenCircle:
1. Explore and follow the most popular or featured creations
2. Interact with friends via likes and comments
3. Share photos to Facebook, LINE, and other social networks
4. Built-in camera lets you take photos then apply customizable filter effects.
5. Discover amazing photo stories created using ASUS PixelMaster Camera and ASUS PhotoCollage

Added ASUS PhotoCollage:
PhotoCollage features a simple and intuitive interface that uses smart face detection to collage photos using customizable grid templates, to apply magazine-styled themes, and to add instant photo effects to your photo collection. It also includes fun themed stickers, templates for special days, and lots of customization tools that let you add your own personality to your photo collection.

For more information please refer to:
TW:http://www.asus.com/zentalk/tw/ReleaseNotes
WW:http://www.asus.com/zentalk/ReleaseNotes
CN:http://zentalk.asus.com.cn/ReleaseNotes

Steps of Update:
1. Check software version of your device**
2. Download device software and Update SOP (From “Manual” Item)
3. Only apply to same SKU update, Example: WW->WW, CN->CN, TW->TW.
4. Software update cannot transfer the software SKU and downgrade the software version.
5. Wrong SKU may cause update failure, please update the same SKU version only.
*How to know the device model?
Path: Settings->About-> Model number
Example: ASUS_T00I
**How to know the device software version?
Path: Settings->About-> software information->Build number
***System upgrade may cause part of data missing, please buckup your important data before system upgrading.

Ukuran File 761.71 MBytesupdate 2015/05/27
Download dari Global

Versi WW_2.22.40.53
Deskripsi ASUS ZenFone 5(T00F/T00J) software Image: V2.22.40.53 for WW SKU only*
Improvement Item:

Battery Draining Detection
1. Add Battery Draining Detection feature
2. Notify to close or uninstall the battery draining apps when detected.
3. The disable setting is under the Battery setting.

Auto start service manager
1. Save battery: prevent unwanted services from self-start and to save system memory.
2. Save memory : Kill services immediately and they won’t be started by Android again.

Added ASUS ZenCircle:
1. Explore and follow the most popular or featured creations
2. Interact with friends via likes and comments
3. Share photos to Facebook, LINE, and other social networks
4. Built-in camera lets you take photos then apply customizable filter effects.
5. Discover amazing photo stories created using ASUS PixelMaster Camera and ASUS PhotoCollage

Added ASUS PhotoCollage:
PhotoCollage features a simple and intuitive interface that uses smart face detection to collage photos using customizable grid templates, to apply magazine-styled themes, and to add instant photo effects to your photo collection. It also includes fun themed stickers, templates for special days, and lots of customization tools that let you add your own personality to your photo collection.

For more information please refer to:
TW:http://www.asus.com/zentalk/tw/ReleaseNotes
WW:http://www.asus.com/zentalk/ReleaseNotes
CN:http://zentalk.asus.com.cn/ReleaseNotes

Steps of Update:
1. Check software version of your device**
2. Download device software and Update SOP (From “Manual” Item)
3. Only apply to same SKU update, Example: WW->WW, CN->CN, TW->TW.
4. Software update cannot transfer the software SKU and downgrade the software version.
5. Wrong SKU may cause update failure, please update the same SKU version only.
*How to know the device model?
Path: Settings->About-> Model number
Example: ASUS_T00I
**How to know the device software version?
Path: Settings->About-> software information->Build number
***System upgrade may cause part of data missing, please buckup your important data before system upgrading.

Ukuran File 759.21 MBytesupdate 2015/05/27
Download dari Global


Like Fans Page AsusLollipop https://www.facebook.com/asuslollipop

Root Asus Zenfone 5 Kitkat ( JELLY BEAN )

Preparation

  • Go to Settings > Security > unchecked “Unknown Sources
  • Download Root ZenFone 1.2r

Root Zenfone 5

  1. Turn off your data / wifi connection (Airplane mode is OK)
  2. Install Root Zenfone 1.2r
  3. Run Root ZenFone, checked “Do not ask”, then OK
  4. Choose SuperSU (by ChainFire)
  5. Select Root button
  6. After demonstartion mode, a message “You have activated this demo device OFFLINE successfully” will appear, close application
  7. Reboot your ASUS ZenFone 5
  8. Run Root ZenFone, if root ssuccess then SuperSU will ask for ROOT access to that application
  9. Done, now your device is successfully root, don`t forget to install BusyBox

Do with Your Own Risk

Download Support File

ASUS Zenfone 5, Back to Stock ROM Without Upgrade / Downgrade Firmware

This is a trick if you want to reset your firmware without factory reset. So you can keep your data, but using this method will remove your custom recovery, root and other modification in your ROM

Preparation

  • Download ASUS Zenfone Stock Firmware that you right now (in this post, i make example using Firmware UL_ASUS_T00F_WW_1_18_40_9.zip)

Zenfone 5 stock ROM without Upgrade / Downgrade

  1. Extract your firmware until you find UL_ASUS_T00F_WW_1_18_40_9-user.zip
  2. Rename UL_ASUS_T00F_WW_1_18_40_9-user.zip to UL_ASUS_T00F_WW_1_19_40_9-user.zip
  3. Connect your device to PC /Laptop
  4. Copy UL_ASUS_T00F_WW_1_19_40_9-user.zip to ASUS Zenfone 5 internal memory
  5. Remove Zenfone 5 from PC / Laptop
  6. A warning window will appear and said a new update firmware is available, select and OK
  7. Wait until update process is finish and reboot your device
  8. Done

note: the trick is only rename the firmware, so system tought that a new update is available.
Do With Your Own Risk

Root ASUS Zenfone 6 Kitkat

XPOSED INSTALLER FOR ASUS ZENFONE LOLLIPOP


Preparation

  • Install Intel Android for driver, check on device manager to make sure that driver has install properly.
  • Download and extract file root for ASUS Zenfone kitkat (pick one from files below).
  • Do not forget to check USB debugging.

Root Zenfone 6 Kitkat

  1. Turn Off the device
  2. Connect your device to PC / Laptop using cable
  3. Reboot ASUS Zenfone 6 to Booatloader, If this step is the first time for your PC / Laptop then once again Windows will install the driver
  4. Go to Root Zenfone extract folder
  5. Run Root-ZenFone6-tw.bat
  6. A command window will open, press any keys to start rooting process
  7. Wait until root process finish and check in your apps, SuperSU is add in your app, mean your device is successfully rooted

Do With Your Own Risk!

Download Support File

source: http://mobilecon.info

Unroot Asus PadFone S

In some condition maybe you want to unroot your device, especially when you want to make a claim to service center. Unroot will relieve ability to explore inside your android.

Unroot Asus PadFone S

  1. Go to Application
  2. Run SuperSU
  3. Tap on Settings
  4. Select “Full Unroot
  5. Then Continue
  6. Done, your device is unroot

Do With Your Own Risk
Some Application that need root device condition may not work after you unroot the device.

Source : http://mobilecon.info

Easy Way to install Custom Recovery on Asus PadFone S

Preparation

  • Download and install Flashify on your device
  • Download CWM / TWRP, copy to your device (if your download file from PC)
  • Install Custom Recovery on Asus PadFone S

  • Go to Application
  • Run Flashify
  • Tap on Backup / Restore
  • Select Recovery Image
  • Choose TWRP /CWM file that you already download it
  • Do Flash, watch carefully in this step, a wrong choice will lead your device to bootloop
  •  
  • Done

Do With Your Own Risk

Some Bug that may occurs

In TWRP, SDcard is not recognize and you only found Internal Storage and USB OTG. Some user also report that it took more time to boot in recovery mode.
In CWM, Sometime it`s difficult to boot in CWM recovery, need several time boot before you can get in.

Download Support File

Source: http://mobilecon.info

Install CWM on Asus FonePad 8

Preparation

  • Download and install ADB into your PC / Laptop
  • Download and install Intel Android Driver
  • Download and extract CWM Temporary FE380CG

Install CWM on Asus FonePad 8

  1. Make sure that Intel android driver install properly, dont forget to install ADB
  2. Turn off your FonePad 8
  3. Connect your device to PC / Laptop
  4. Boot in fastboot mode, Press and hold Power + Volume[+] buttons until you see Asus logo
  5. Go to Windows and go to CWM extract folder
  6. Double click on launcher.bat
  7. type ACCEPT , make sure you write with all caps
  8. this information will appear

    DEVICE STATUS: FASTBOOT-ONLINE
    DEVICE INFORMATION: EAOKBC000000 fastboot

  9. Next, type T2 , using all caps, don`t be surprise when a broken image appear in your screen, it have no effect to your device
  10. After installation complete, remove your device from PC/ Laptop
  11. Reboot your device
  12. Done

Do With Your Own Risk

Download Support File

Source : http://mobilecon.info